

An automated food diary can reduce typing, but it can’t turn every meal photo into an exact nutrition record. If manual entry takes too long, it’s easy to postpone logging until details are forgotten. Automation can make meal capture more practical, while portion sizes and ingredients may still need your review.
You don’t need to record every detail perfectly for a food diary to be useful. A repeatable routine can help you capture meals consistently and notice patterns, without treating estimates as precise measurements or health conclusions. This article explains how to set up a straightforward meal-logging workflow and use automation with realistic expectations.
You’ll learn what photo, barcode, and recipe tools can capture, when to check an entry, and how to review your diary as a practical record. The aim is a routine you can maintain, not a set-and-forget log.
Key Takeaways
- Choose a clear tracking purpose before setting up your meal-logging routine.
- Match the capture method to the meal and the details available to you.
- Use an automated food diary to reduce repeated entry, then check uncertain details instead of treating estimates as exact.
- Review food identity, ingredients, serving size, and possible omissions to keep entries useful.
- Start with a manageable routine, then adjust methods that lead to incomplete or delayed logs.
What an Automated Food Diary Records, and What It Cannot Know
Manual meal logs can become incomplete when entries are postponed or forgotten. An automated food diary is a digital record that reduces some of the steps involved in documenting meals. Depending on the app, you might capture a meal with a photo, scan a barcode, or import a recipe. The app may then suggest or add food details to an entry, which you can review and adjust.
The diary records information you enter alongside details selected or suggested by the app. Those details can have different levels of certainty. A barcode may identify a packaged item in the app’s database, while a photo-based entry may rely on food recognition and an estimated portion. The record can help you review eating patterns, but it is not a medical assessment or diagnosis. A food diary is a tracking tool, similar to the broader practice of keeping a food diary.
Which parts of meal logging can be automated?
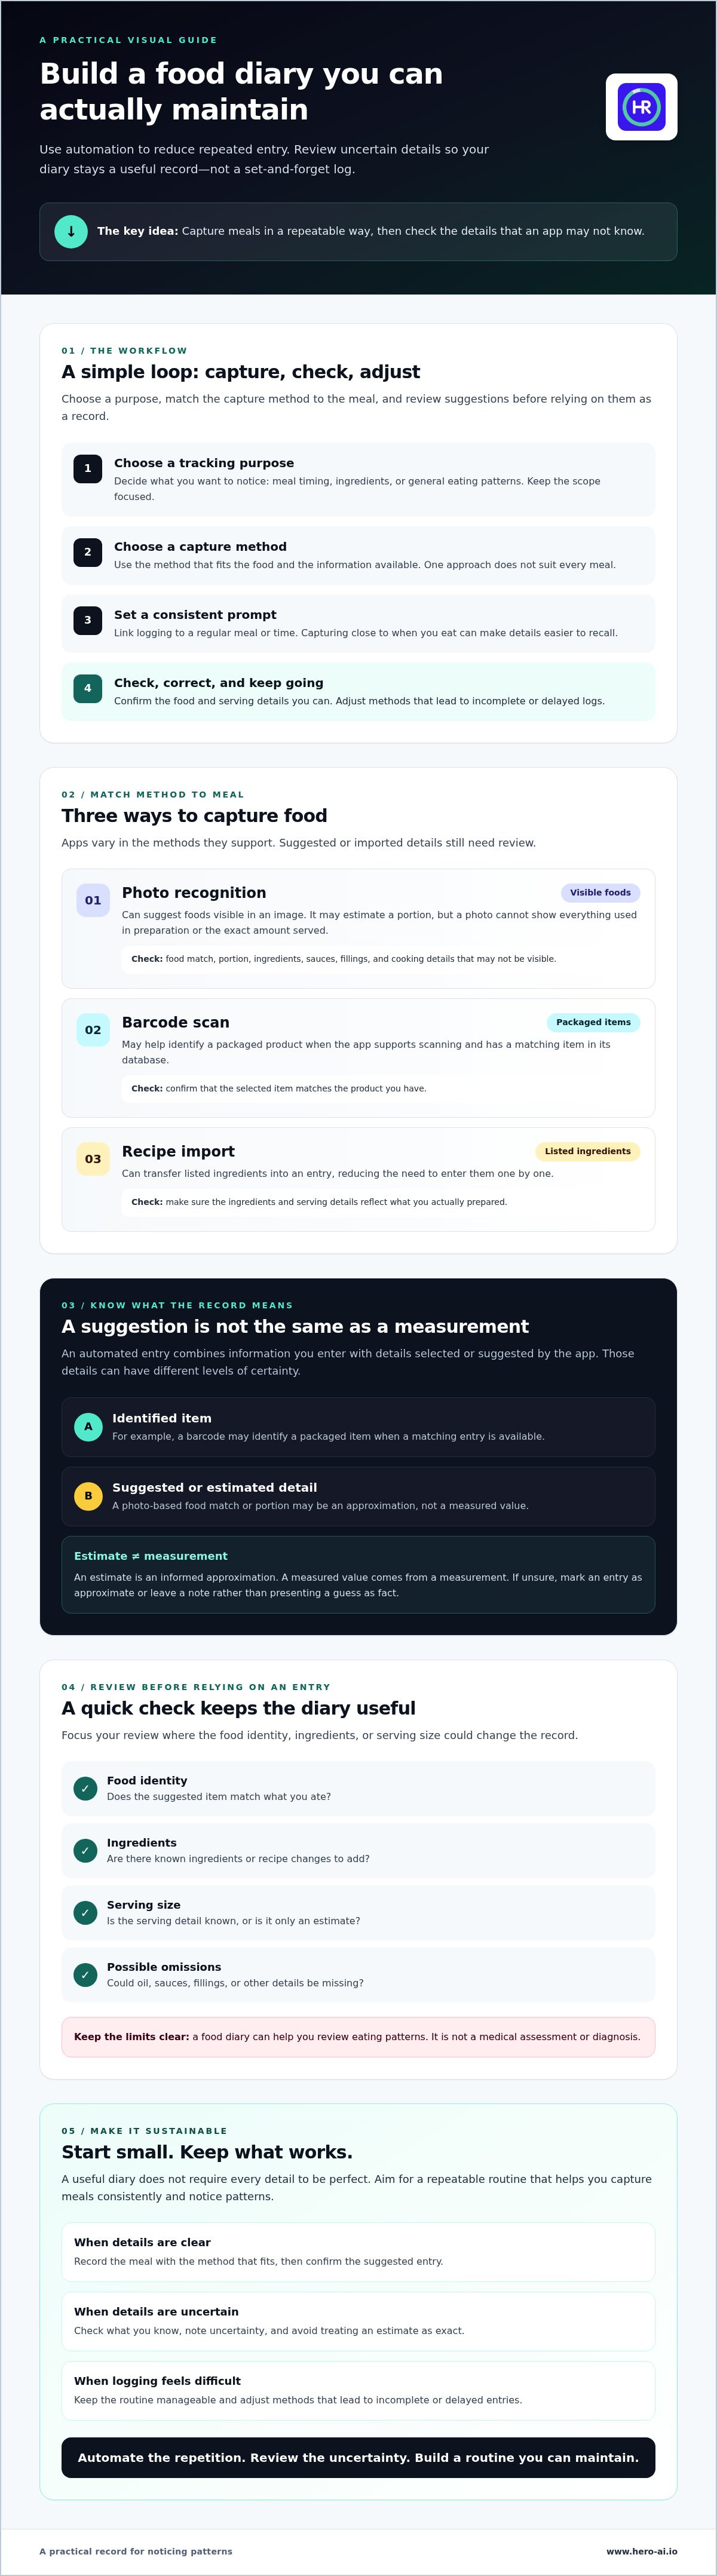
Each capture method suits different meals. Photo recognition can suggest foods visible in an image. Barcode scanning can help identify a packaged product when the code and a matching item are available. Recipe import can transfer listed ingredients into an entry, reducing the need to enter them one by one. After a food is selected or recognized, an app may fill in fields such as the food name or nutrition information. Features vary by app, so check which methods it supports.
Automation reduces repetitive data entry, but it doesn’t remove every decision. You may still need to confirm the item, choose a serving, or add details missing from the initial entry. For example, a packaged snack may be straightforward to identify, while a homemade dish may need you to check its ingredients and serving.
Why an automated entry may need review
A photo shows visible food, not everything that went into its preparation. It may not reveal oil, sauces, fillings, cooking methods, or the exact amount served. Mixed dishes can contain ingredients that look similar in an image. Customized recipes may also differ from a standard recipe in ingredients or quantities. Add or correct details when you know them. If you’re unsure, mark the entry as approximate or leave a note rather than presenting a guess as fact.
An estimate is an informed approximation; a measured value comes from a measurement. A portion inferred from a photo should not be treated as if it were weighed. The same applies when an app suggests a food match you haven’t confirmed. Review entries where the food identity, ingredients, or serving size could change the record. This keeps the diary useful while making uncertainty visible.
How to Start an Automated Food Diary in a Few Repeatable Steps
Set up the process around the information you actually plan to review. An automated food diary is easier to maintain when its purpose, capture method, and routine are clear from the start. Use these steps to create a workable setup:
- Choose a tracking purpose. Decide what you want the record to help you notice, such as meal timing, ingredients, or general eating patterns. Keep the scope focused so each entry has a clear reason.
- Select a capture method. Match the method to the food and the features available in your app. Use different methods for different meals rather than forcing one approach to fit every situation.
- Set a routine and review entries. Choose a consistent prompt, such as before or after a regular meal. Check the suggested food and serving details, then correct what you know before accepting the entry as part of your record.
Recording a meal close to when you eat it can make details easier to recall. Harvard Health Publishing offers guidance on starting and reviewing a food diary. For a broader explanation of automated logging, see this guide to a digital food journal with AI.
Choose a capture method for each meal
Use a photo when the meal is ready and its main components are visible. For packaged foods, barcode scanning may help identify the item if the app supports it and has a matching entry. For a supported recipe, import the ingredient list, then check that the ingredients and serving details reflect what you prepared. In each case, confirm the suggested entry before relying on it as a record.
One method won’t suit every meal. A home-cooked dish may need recipe details, while a clearly visible meal may be quicker to capture with a photo. Choose based on the information available, not on the assumption that one input method works equally well for all foods.
Build a low-friction daily routine
Link capture to a consistent time or meal-based prompt, then keep the entry brief. Add detail when it supports your purpose, such as noting a changed ingredient or an uncertain portion. A prompt near the meal can help you log while details are still easier to recall.
Start with a routine that fits your day, then adjust it if entries are repeatedly delayed or incomplete. The best setup is one you can repeat and review, not one that requires documenting every detail of every meal.
Photo, Barcode, or Recipe Import: Choose the Right Logging Method
The right capture method depends on the food and the information you have. A photo can start a meal entry without typing each item. A barcode can help identify packaged food. Recipe import can transfer ingredients from a supported recipe. Each method needs a different kind of review, so choose the one that best fits the meal rather than expecting one input to work for everything.
| Method | Suitable use | Review needs |
|---|---|---|
| Photo | A plated meal with visible components | Check food matches, hidden ingredients, and serving estimates. |
| Barcode | Packaged food with a scannable code | Confirm the selected item matches the package and serving recorded. |
| Recipe import | A supported recipe with an ingredient list | Check ingredients, substitutions, and the number of servings. |
When photo-based meal logging is useful
A photo is a useful starting point when the meal is ready and its main components can be seen. It can help you begin an entry without typing each food separately. A clear image may also make it easier to compare the suggested entry with what was served. It won’t confirm every ingredient or portion, so correct omissions and serving details you know. For more context on this capture method, see this guide to a photo food tracker subscription.
When barcode scanning or recipe import fits better
For packaged foods, barcode scanning can provide a direct route to a matching database entry when the app supports scanning and recognizes the code. Check the product and serving details before saving it. This is different from a photo of a meal, where the app may need to infer what is present.
Recipe import suits a supported recipe with listed ingredients, including recipes found on social media. Review the ingredient list against the version you prepared, then confirm serving information. Substitutions or changes in quantities may need manual correction. For more on connected recipe workflows, read about social media fitness integration.
An automated food diary can use more than one method across a day. Select the input that provides the clearest starting information, then review the entry for details the capture method cannot establish.
How to Review Entries and Keep Your Food Diary Useful
Automation creates a starting record, not a verified account of everything in a meal. A short review can catch mismatches and make the information more useful for the purpose you chose. For related detail on automated nutrition-data capture, see this AI calorie counter guide.
A simple review checklist for each entry
Before accepting an entry, check the details most likely to affect whether it reflects the meal you ate:
- Food identity: Does the recognized item match the food or dish?
- Ingredients: Are visible components included? Add known ingredients that may be missing, especially in mixed dishes.
- Serving: Does the portion shown in the entry reasonably match what you ate?
- Omissions: Is anything obvious missing, such as a side, topping, or drink?
Correct an entry when you can verify the detail. Replace a mistaken food match. If the amount or ingredient is uncertain, leave it marked as an estimate or add a note if the app allows it. Don’t fill gaps with precise-looking guesses. A clearly identified uncertainty is more useful than an unsupported value presented as exact.
Use records without overinterpreting them
A food diary reflects the information captured, selected, and entered. It can help you review patterns over time, but it doesn’t establish why those patterns occur or evaluate your health. Review trends only when they relate to your stated purpose. For example, if you’re tracking meal timing, look at timing entries rather than drawing conclusions from unrelated nutrition estimates.
Calorie and nutrient values can depend on food identification, recipe details, and portion estimates. A diary entry is not a clinical evaluation, and no single calorie or macronutrient target suits every person. Use the record as practical information, not as a diagnosis or a substitute for individual advice.
If a pattern raises a medical or nutrition question, discuss it with a qualified health professional who can consider your circumstances. Keep the diary available as context, and be clear about which entries were measured, confirmed, or estimated. This helps distinguish recorded information from assumptions.
You don’t need to review every field in detail for every meal. Prioritize corrections that matter to your tracking purpose, and use the same basic checklist consistently. That keeps an automated food diary useful without making review another demanding task.
A Sustainable Automated Food Diary Workflow: Start Small and Adjust
A routine is more likely to be useful when it fits your day and serves a clear purpose. You don’t need to log every meal from the start. Test a simple process, then adjust it based on what you can maintain and what information you want to review.
A practical first-week setup
For the first week, choose one or two meals or a consistent meal period to record. Use the capture method that suits each meal and the information available. Take a photo when the main components are visible, scan a packaged item if barcode capture is supported, or import a recipe when the app accepts it. Review entries briefly and note where corrections recur, such as serving size or missing ingredients.
At the end of the week, assess the process rather than aiming for a perfect record. Were entries easy to capture? Did one method regularly leave out details? If photos create uncertainty for a particular meal, try another method when suitable. If recipe imports need repeated corrections, keep the useful parts and add the missing information yourself. The goal is a repeatable record, not exhaustive detail.
When an automated food diary may not be the right fit
Automation isn’t necessary for everyone. Manual notes may suit people who prefer not to use image-based logging or who want more control over what they record. You can also change methods, reduce the amount you track, or pause if logging becomes burdensome or causes distress. Food tracking isn’t a requirement for health, and a diary can’t replace professional care or individual medical guidance.
Hero AI offers photo-based meal logging, barcode scanning, and recipe import, including recipes from social media. Its annual subscription provides access to these nutrition-tracking tools and a database of over 3 million verified foods. These features can support a workflow that uses different capture methods, while still leaving you responsible for checking details the app cannot establish.
For an overview of the platform’s meal-logging features, see Hero AI.
Build a Routine You Can Review and Maintain
An automated food diary can reduce repetitive meal entry, but its value depends on a routine you can sustain and entries you’re willing to check. Choose a capture method that fits the meal, record it close to when you eat when practical, and correct details you know. Treat estimates as estimates, not exact measurements or a medical assessment.
Start with a manageable set of meals. After a short period, review what worked and where entries needed repeated corrections. Keep the methods that fit your routine, and change or pause tracking if it becomes burdensome.
Hero AI’s annual subscription includes photo-based meal logging, barcode scanning, recipe import, and access to a database of over 3 million verified foods. If you’re comparing tools for your routine, explore Hero AI’s meal-tracking features to see whether they fit your logging needs. Begin with a few consistent entries and adjust as you learn what works.
Frequently Asked Questions
What is an automated food diary?
An automated food diary is a digital record that reduces some manual steps in logging meals. Depending on the app, you may start an entry with a meal photo, scan a packaged food’s barcode, or import a supported recipe. The app can suggest or populate entry details, but you may still need to confirm the food, ingredients, and serving. It’s a tracking aid, not a medical assessment.
How do I start using an automated food diary?
Start by choosing what you want to track, such as meal timing or general food patterns. Select an app and check which capture methods it supports. Begin with one or two meals or a regular meal period, rather than aiming to log everything immediately. Record meals close to when you eat when practical. Review suggested details and correct anything you know is incomplete or inaccurate.
Can an app identify everything in a meal photo?
No. A photo can show visible components, but it may not reveal hidden ingredients, preparation methods, or exact portion sizes. A mixed dish may also contain ingredients that look similar or are difficult to distinguish in an image. Treat the result as a suggested entry. Check whether it matches the meal, add known missing ingredients, and adjust the serving estimate instead of assuming the app recognized everything.
Are automated food diaries accurate?
Accuracy varies with the capture method, the app’s database, and the information provided. A barcode may identify a packaged item if there’s a matching database entry. Photo-based logging may estimate foods or portions, while a recipe import depends on the listed ingredients and serving details. Check entries before relying on them. Treat unconfirmed portions or ingredients as estimates, not measured values or exact nutrition data.
Is a food diary useful if I do not log every meal?
It can still be useful if the entries support a clear purpose. For example, logging a regular meal period may help you review timing or the foods you tend to include. Partial records won’t describe every meal, so note what you logged and avoid treating gaps as evidence that something did not happen. Choose a routine you can maintain, and change or pause it if tracking becomes burdensome.
Can I import a recipe from social media into a food diary?
Some apps support importing recipes from social media, but availability depends on the app and its features. Check whether the recipe source is supported and whether the import includes the ingredient list and serving information. Compare those details with the version you prepared. Add substitutions or changed quantities so the diary reflects your meal. If import isn’t available, you can enter the recipe manually when the app allows it.
Should I use an automated food diary for medical nutrition advice?
No. An automated food diary records information that you or the app capture; it does not provide a clinical evaluation or diagnosis. Nutrition estimates may be incomplete, and a general target may not suit your individual needs. If you have a medical condition, questions about nutrition, or need advice tailored to your circumstances, consult a qualified health professional. A diary may help organize information for that conversation, but it cannot replace professional care.


